The short answer is No. Stone cladding and ceramic tiles do not stop rising damp. They can cover the stains, peeling paint and salt marks, but they do nothing to stop ground moisture travelling up through the wall behind them.
Rising damp happens when moisture from the ground is drawn upwards through porous materials such as sandcrete blocks, mortar joints and concrete. In Africa's humid conditions, it shows up as damp patches, bubbling or peeling paint, crumbling plaster and white salt deposits along the base of walls.
Faced with these signs, many property owners cover the wall with tiles or stone cladding. It looks like a solution — but it only moves the problem out of sight.
Why people tile over damp walls
Tiles and stone are durable, attractive and easy to clean, so covering a damp patch with them feels like a sensible upgrade. The surface looks dry and finished.
Behind the tiles, though, the wall is often still wet. Moisture can carry on rising through the blockwork, appear above the tiled area, and leave salts building up behind the finish. Hiding a damp patch is not the same as treating rising damp.
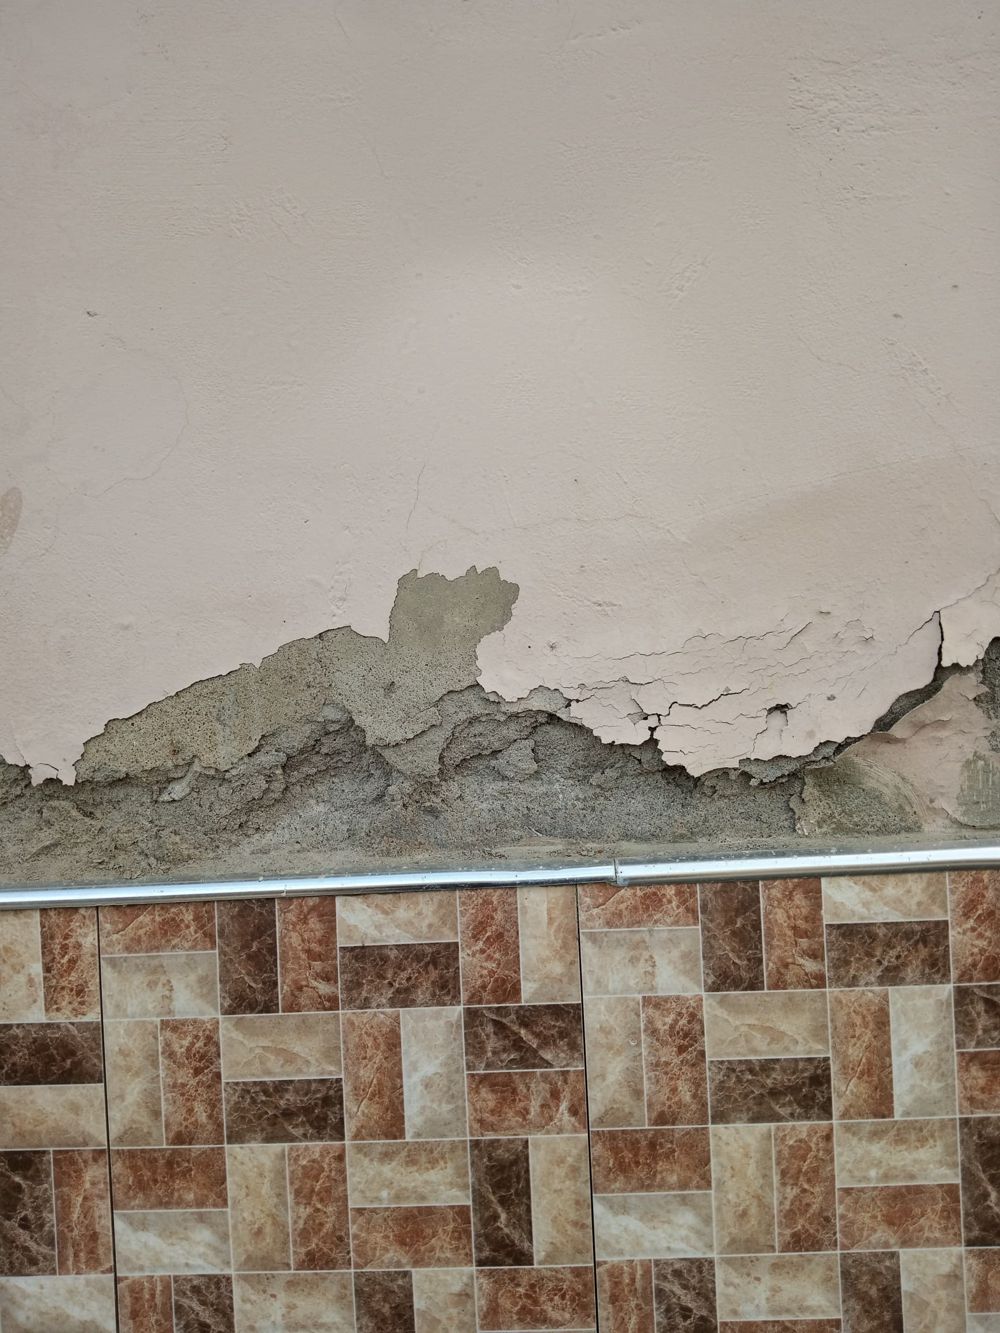
Why tiles can't block rising damp
Glazed ceramic tiles absorb very little water through their face. But rising damp doesn't need to pass through the tile at all.
It moves through the tiny connected pores — capillaries — inside the masonry and mortar. Where a building has no damp-proof course (DPC), or the existing one has failed or been bridged, ground moisture climbs through these pores by capillary action. A tile stuck to the face of the wall doesn't interrupt that movement.
Stone cladding is no different. Even a dense, low-porosity stone does not create a continuous barrier inside the wall.
What happens when you tile over a damp wall
Covering a damp wall without dealing with the cause can create new problems:
Moisture keeps rising
Ground moisture carries on travelling up the wall behind the tiles.
Salts build up
Salts carried in groundwater crystallise as the wall dries, attacking plaster and tile adhesive.
Tiles come loose
Persistent moisture and salt crystallisation can weaken adhesives and cause tiles to debond.
Damage stays hidden
The tiles conceal ongoing dampness, so the extent of the damage is harder to see.
Damp moves higher
Moisture can surface above the tiled section or in neighbouring areas of the wall.
Not every tiled wall will show all of these, but they explain why tiling alone is not a reliable rising damp treatment.
Is stone cladding better than ceramic tiles?
Neither material treats rising damp. Stone is chosen for its character and ceramic tiles for their easy-clean surface, but both sit on the face of the wall, while rising damp travels inside it.
A water-resistant finish may limit moisture entering through that surface, but it does not replace a working damp-proof course or stop moisture rising inside the masonry.
It's also worth confirming the problem really is rising damp. Rain penetration, leaking pipes and condensation look similar but need different solutions. Diagnosis always comes before treatment — see our guide to rising damp vs penetrating damp.
How to treat rising damp properly
A lasting fix stops moisture at its source rather than covering the symptoms. Once rising damp is confirmed and other moisture sources have been ruled out or repaired, the StopDamp+ treatment follows seven stages:
- Remove PlasterHack off salt-contaminated plaster to a suitable height above the visible damage.
- Drill HolesDrill 12 mm holes into the mortar course at roughly 100 mm spacing.
- Clear HolesRemove dust and debris so the cream fills each hole fully.
- Inject CreamInject StopDamp+ Injection Cream into the mortar course to form a water-repellent barrier inside the wall.
- CureAllow the cream to cure and form the new damp-proof course.
- Apply BaseShieldStopDamp+ BaseShield is brushed on the wall, from floor level up, to help prevent moisture movement.
- Replaster with Cement MixReplaster using a mix containing StopDamp+ Cement Mix, an anti-salt damp-proof additive.
Full step-by-step detail is in our Installation Guide.
How StopDamp+ deals with rising damp
StopDamp+ is a BBA Agrément certified chemical injection system supplied by SoAqua Solutions Ltd. Its advanced cream forms a water-repellent barrier in the mortar course, cutting off the capillary path that ground moisture uses to climb the wall.
Every StopDamp+ assessment also checks for leaks, rain penetration and high external ground levels, so all sources of moisture in the wall are identified and dealt with.
Should you tile before or after treating rising damp?
After. Treat the cause first, then tile.
Once the damp-proof course is in place, BaseShield applied and the wall replastered with Cement Mix, allow the new plaster to dry fully before fitting tiles or stone cladding. Tiling too early can trap moisture and hide an unresolved problem — making later repairs harder and more expensive.
Tiles hide rising damp — they don't cure it
Stone and ceramic tiles can make a wall look better but on their own they will not stop rising damp. Moisture keeps travelling through the masonry behind them, carrying salts that can damage the wall and the finish.
The right order is simple: diagnose the cause, stop the moisture at its source, repair salt-damaged plaster, then add your decorative finish. StopDamp+ is a proven long-lasting system built to do exactly that.
← Back to all articles